Skip to content

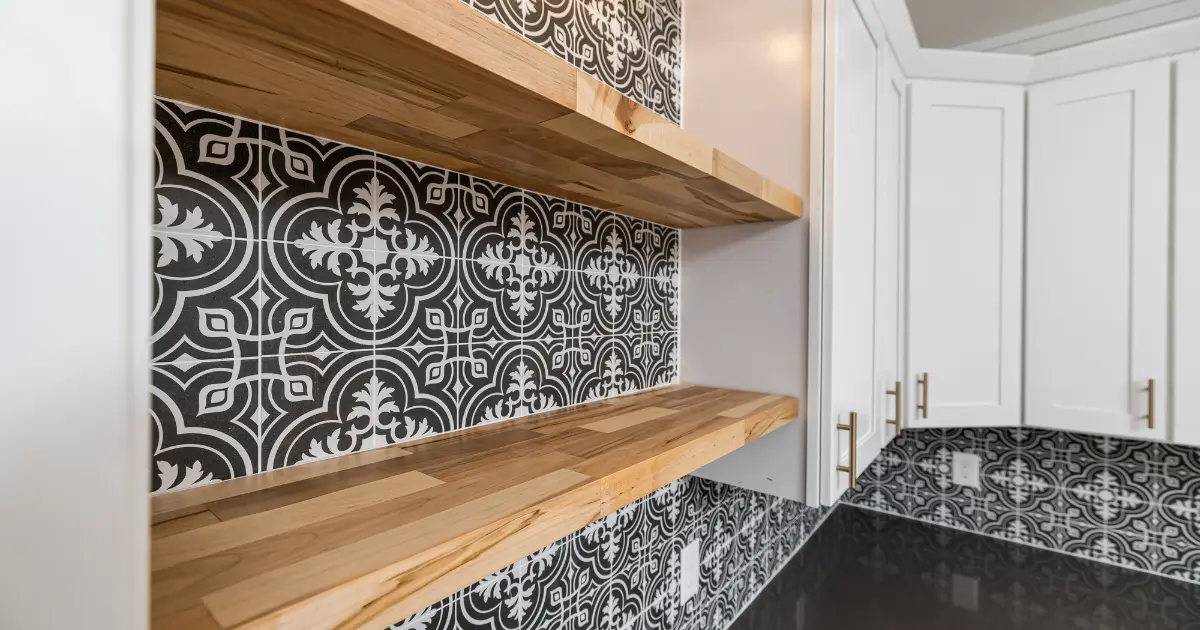
Whether you’re installing a bathroom floor, laying kitchen tiles, or designing a sleek accent wall, porcelain tiles are a top choice — and for good reason. They’re stylish, durable, and water-resistant. But when it comes time to cut them, many DIYers pause and wonder: How to cut porcelain tiles cleanly without cracking or chipping them?
Don’t worry — you’re in the right place. This guide will walk you through everything you need to know, from choosing the right tools to mastering your first cut. Whether you’re a total beginner or just need a refresher, we’ve got your back.
Why Porcelain Tiles Are Challenging (and How to Conquer Them)
Porcelain tiles are denser and harder than ceramic due to their high-temperature firing process (up to 2,500°F!). This makes them:
- More durable for high-traffic areas.
- Tougher to cut without specialized tools.
- Prone to chipping if handled incorrectly.
So it is better to use diamond-coated blades (for wet saws/grinders) or carbide scoring wheels (for manual cutters). Standard blades won’t cut it—literally.
Safety Gear: Non-Negotiables for DIYers
Before grabbing your tools, suit up! Skipping safety gear is the #1 mistake beginners make.
| Gear | Why It Matters |
| Safety Glasses | Porcelain shards are razor-sharp and can cause permanent eye damage. |
| Cut-Resistant Gloves | Protects hands from sharp edges and blade slips (especially with grinders). |
| Dust Mask/Respirator | Silica dust from dry cutting is a carcinogen—even brief exposure is dangerous. |
| Ear Protection | Angle grinders and wet saws exceed 90 decibels (long-term exposure risks hearing loss). |
| Knee Pads | Save your knees during long floor-tile projects. |
Pro Tip: Work in a well-ventilated area or use a shop vac with a HEPA filter to capture dust.
Choosing the Right Cutting Tool
Let’s break down the three most common tools for cutting porcelain tiles, and which one is best for your project.
1. Manual Tile Cutter
A manual tile cutter scores the tile’s surface and snaps it cleanly. It works best for quick straight cuts on standard tile thickness.
- Pros: Affordable, easy to use, no electricity needed
- Cons: Not suitable for curves or thick tiles
2. Wet Tile Saw
A wet saw uses a diamond-tipped blade and a continuous water stream to reduce friction and cool the blade. It’s ideal for larger projects or more intricate installations.
- Pros: Smooth edges, minimal chipping, can handle big jobs
- Cons: Higher cost, needs water and electricity
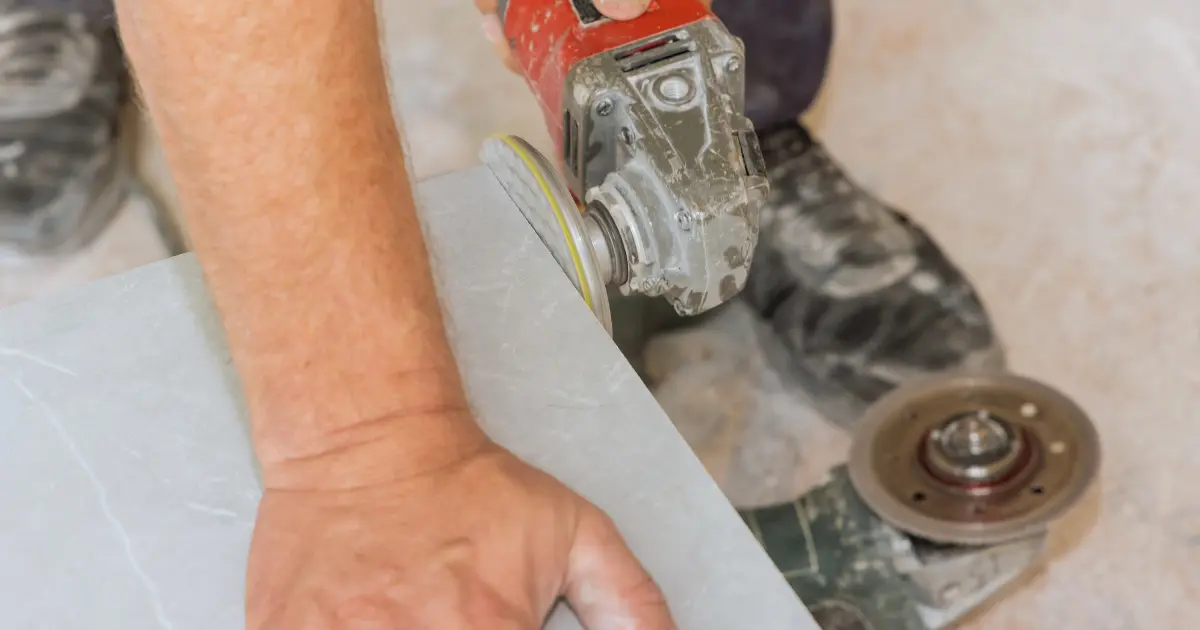
3. Angle Grinder with Diamond Blade
An angle grinder is your best bet for detailed or irregular cuts, such as around pipes or fixtures. Use with care, as it’s easy to overcut if you’re not steady.
- Pros: Very versatile, ideal for cutting around outlets or plumbing
- Cons: Dusty, louder, requires more precision
Method 1: Manual Tile Cutter (Score-and-Snap)
Best for: Straight cuts on tiles up to 24” long (e.g., subway tiles, wall accents).
Tools Needed
- Manual tile cutter
- Carbide scoring wheel (replace if worn)
- Tile file or 120-grit sandpaper
- Grease pencil or marker
- Straightedge or carpenter’s square
Step-by-Step Guide
- Measure and Mark: Use a grease pencil and straightedge to draw your cut line. Double-check measurements—measure twice, cut once!
- Position the Tile: Place the tile in the cutter, aligning the marked line with the scoring wheel.
- Score the Tile: Apply firm, even pressure as you drag the scoring wheel across the tile once. Don’t rescore—this causes jagged breaks.
- Snap the Tile: Lower the breaker bar and press down sharply. The tile should cleanly split along the score line.
- Smooth Edges: Use a tile file or sandpaper to remove sharp edges.
Troubleshooting:
- Tile doesn’t snap cleanly?
- Cause: Insufficient scoring pressure.
- Fix: Adjust the cutter’s pressure screw or replace a dull scoring wheel.
- Chipped glaze on the surface?
- Cause: Uneven pressure during scoring.
- Fix: Apply masking tape over the cut line before scoring to stabilize the glaze.
Pro Tip: For tiles thicker than 8mm, opt for a heavy-duty manual cutter with a tungsten carbide wheel.
Method 2: Wet Saw (Power Tool for Precision)
Best for: Large-format tiles (24×24” or bigger), diagonal cuts, and complex patterns.
Tools Needed
- Wet saw
- Continuous-rim diamond blade (for porcelain)
- Water pump (to keep the blade cool)
- Non-slip workbench or sawhorses
- Squeegee or sponge
Step-by-Step Guide
- Set Up the Saw:
- Fill the reservoir with water (most saws hold 2–3 gallons).
- Check that the water pump is circulating properly.
- Adjust the blade guard to 1/8” above the tile surface.
- Mark the Tile: Use a grease pencil to draw your cut line. For diagonal cuts, mark both edges.
- Position the Tile: Place the tile face-up on the sliding table, aligning the cut line with the blade.
- Make the Cut:
- Turn on the saw and wait for the blade to reach full speed.
- Gently push the tile through the blade with steady pressure. Let the blade do the cutting—don’t force it!
- For diagonal cuts, clamp a wooden guide to the table at your desired angle.
- Clean the Tile: Rinse off slurry (a mix of water and tile dust) with a sponge to prevent staining.
Troubleshooting:
- Chipping on the edges?
- Cause: Dull blade or too much pressure.
- Fix: Replace the blade or slow your feed rate.
- Blade wandering off the line?
- Cause: Warped sliding table or misaligned fence.
- Fix: Use a straightedge to check the table’s alignment.
Pro Tip: For bullnose edges (smooth and rounded edging style), use a profiling wheel attachment on your wet saw.
Method 3: Angle Grinder (Curves & Notches)
Best for: Cutting around pipes, electrical outlets, or curved designs.
Tools Needed
- Angle grinder
- Diamond turbo blade (4” or 7”)
- Clamps or suction cup handle
- Spray bottle with water
- Diamond hand file
Step-by-Step Guide
- Mark the Cut: Outline the shape with a grease pencil. For circles, use a plastic template or compass.
- Secure the Tile:
- Clamp the tile to a workbench.
- For freehand cuts, use a suction cup handle for better control.
- Make the Cut:
- Turn on the grinder and let it reach full speed.
- Hold the grinder at a 45° angle and gently guide the blade along the marked line.
- Work in small sections to avoid overheating the blade.
- Refine the Edge: Smooth rough edges with a diamond hand file or sanding block.
Troubleshooting:
- Blade binds or kicks back?
- Cause: Forcing the grinder through the tile.
- Fix: Let the tool’s weight and blade do the work—no pushing!
- Tile cracks mid-cut?
- Cause: Uneven pressure or thin tile.
- Fix: Support the tile with plywood underneath and cut slowly.
Pro Tip: Use a diamond hole saw for perfect circles around pipes.
Niche Method: Glass Cutter for Thin Porcelain
Best for: Delicate mosaic tiles (2–4mm thick) or intricate designs.
Tools Needed
- Glass cutter
- Running pliers
- Straightedge
- Felt-tip pen
Step-by-Step Guide
- Mark the Line: Use a felt-tip pen and straightedge.
- Score the Tile: Apply firm pressure with the glass cutter in one smooth pass.
- Snap the Tile: Position the scored line over the edge of a table and press down with running pliers.
Best For: Small repairs or artistic projects. Not recommended for tiles thicker than 4mm.
Tool Comparison: Which Should You Choose?
| Tool | Best For | Blade Type | Skill Level |
| Manual Tile Cutter | Straight cuts ≤24” | Carbide scoring wheel | Beginner |
| Wet Saw | Large tiles, complex angles | Diamond continuous | Intermediate |
| Angle Grinder | Curves, notches | Diamond turbo | Advanced |
| Glass Cutter | Thin mosaics, delicate work | Tungsten carbide tip | Beginner |
Pro Tips for Perfect Tile Cuts
- Use blue painter’s tape along your cut line to reduce chipping.
- Always cut with the glazed side up on a manual cutter or wet saw.
- If using a grinder, make shallow passes instead of one deep cut.
- Practice on a spare tile before committing to your actual piece.
- Let the blade do the work — never force the tile through.
How to Cut Porcelain Tiles Without a Wet Saw
If you don’t own a wet saw, don’t panic. Many small projects — especially backsplashes or minor repairs — can be done using a manual tile cutter or angle grinder. For large flooring installations, though, renting a wet saw is worth the cost.
Bonus tip: Some hardware stores rent tile saws by the hour or day. Ask your local supplier if they offer rentals.
When Should You Call a Professional?
If your project involves:
- Custom cuts around plumbing or HVAC
- Expensive or decorative tile patterns
- Heated floor systems
- High-end finishes or mosaics
…it might be worth reaching out to a professional tile installer or visiting our showroom for help. A single mistake on a costly tile job can set you back.
Best Practices Before You Start a Tiling Project
Before diving in, take time to:
- Plan your tile layout — this helps reduce the number of awkward or thin cuts at the edges.
- Order extra tiles — expect 10–15% waste due to cutting errors or breakage.
- Dry-fit your tiles — lay them out before applying mortar to see where cuts are needed.
- Check local stores — get advice and product demos from pros at our showroom.
Need Help with Tile Cutting? Visit Tile Factory Today!
Whether you’re starting your first DIY tile project or planning a full renovation, we’re here to help. At Tile Factory Direct, we carry a wide selection of tile-cutting tools, offer expert advice and can even provide a list of recommended local installers upon request.
Need Expert Help?
???? Call us at 770-773-7726 or visit us for:
- Free project consultations.
- Huge selection of tile.
- Tile at wholesale prices.