Skip to content


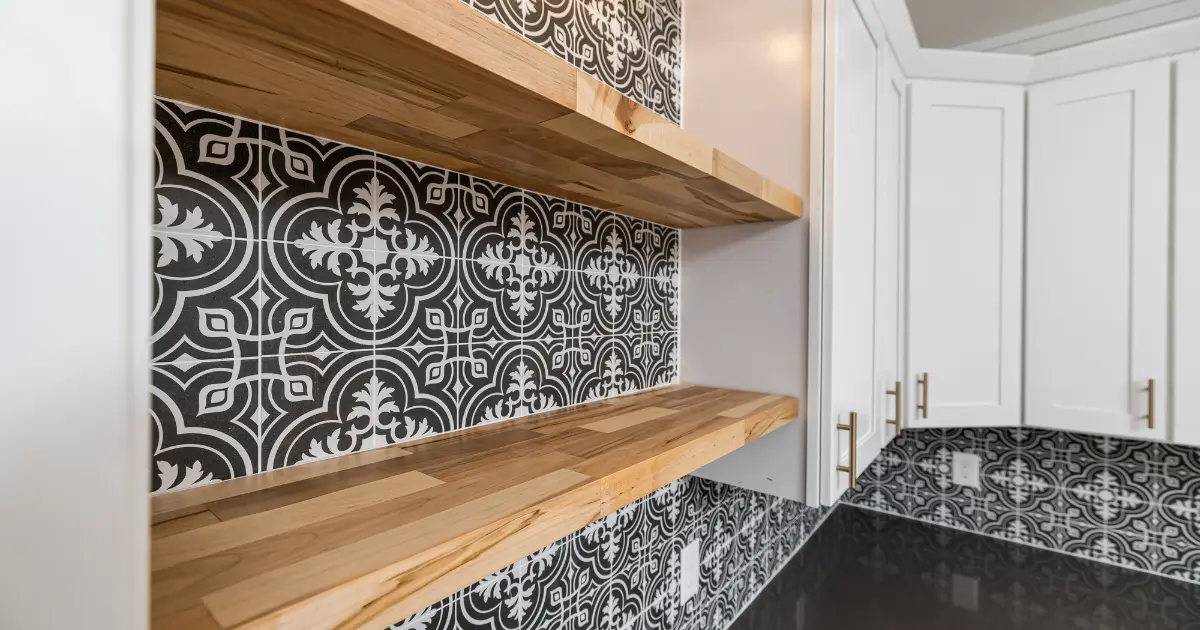
Precise tile cutting is essential for achieving a professional and polished look in tiling projects. Accurate cuts ensure that tiles fit perfectly into the designated spaces, minimizing gaps and maintaining a clean, seamless appearance. This precision is particularly important in complex installations, where misaligned tiles can lead to uneven surfaces and affect the overall aesthetic.
However, tricky tile cuts can present several challenges. These include cutting around irregular shapes, corners, and fixtures, which often require careful measurement and specialized tools. Additionally, maintaining accuracy while working with fragile tiles or intricate patterns can be difficult. Overcoming these challenges is key to achieving a high-quality finish in any tiling job.
Essential Tools for Tile Cutting
To achieve precise and clean tile cuts, having the right tools is crucial. Here’s an overview of essential tile cutting tools and tips for selecting the right one for various cuts:
Tile Cutter: A tile cutter is a manual tool used for straight cuts. It features a scoring wheel that scratches the tile surface, allowing you to snap the tile along the scored line. This tool is ideal for ceramic and porcelain tiles. For best results, choose a tile cutter with a sturdy base and a scoring wheel that can handle the thickness of your tiles.
Wet Saw: A wet saw uses a diamond blade and water to cut tiles, reducing dust and providing cleaner cuts. It is particularly useful for cutting larger tiles, as well as those made from hard materials like granite or marble. When selecting a wet saw, consider the size of the tile, the blade’s quality, and the saw’s cutting capacity to ensure it meets your project’s needs.
Tile Nippers: Tile nippers are used for making small, irregular cuts or trimming edges. They are perfect for fitting tiles around corners or cutting small sections from a tile. Look for nippers with strong, sharp jaws to handle the material of your tiles effectively.
Tile Drill Bit: For creating holes in tiles (for plumbing or electrical fittings), a tile drill bit with a carbide tip is essential. Choose a drill bit that matches the diameter of the holes you need to make and ensure it’s compatible with your drill.
Angle Grinder: An angle grinder with a diamond blade can be used for cutting tiles, especially for more complex shapes or when precision is less critical. It’s versatile but requires careful handling to avoid damaging the tile.
Tips for Selecting the Right Tool for Tile Cuts:
Type of Tile: Match the tool to the tile material. Wet saws and tile nippers are generally good for ceramics and porcelain, while angle grinders and tile drills are better for harder materials.
Type of Cut: Use a tile cutter for straight cuts, a wet saw for large or intricate cuts, and tile nippers for small, detailed adjustments.
Tile Size: Larger tiles may require a wet saw for clean cuts, while smaller tiles can often be managed with a manual tile cutter or nippers.
Project Complexity: For simple projects, a tile cutter and nippers may suffice. For more complex or professional jobs, investing in a wet saw or angle grinder might be beneficial.
Preparing for the Cut
Accurate measurement is the foundation of a successful tile cutting job. To ensure precision, start by measuring the area where the tile will be placed. Use a reliable measuring tape or a ruler to take exact dimensions. For more complex layouts, consider using a laser level or a square tool to verify measurements and ensure straight lines. Double-check all measurements before cutting to avoid mistakes and waste.
Once measurements are confirmed, marking the tile correctly is crucial for achieving clean cuts. Use a pencil or a tile marker to make clear, visible lines on the tile surface. Pencils are often preferred for their precision and ease of removal, but tile markers, which are designed specifically for this purpose, can also be effective. For intricate cuts or when working with multiple tiles, templates can be highly useful. Create a template from cardboard or paper to outline the shape you need to cut, ensuring a consistent approach for each tile. Proper marking helps guide your cuts and minimizes the risk of errors, resulting in a cleaner and more professional finish.
Techniques for Common Cuts
Straight Cuts
Achieving a clean straight cut is essential for a professional tiling job. When using a tile cutter, start by carefully scoring the tile along the marked line using the scoring wheel. Apply consistent pressure to create a uniform score. Once scored, place the tile on the cutter’s break bar and gently apply downward pressure to snap the tile along the scored line. For larger tiles or harder materials, a wet saw is often more effective. Position the tile against the saw’s fence, align it with the blade, and slowly push the tile through the water-cooled diamond blade. Ensure the tile is steady and the cut line is aligned with the blade for a smooth, accurate cut.
Curved Cuts
Curved cuts require more precision and a different approach. Tile nippers are ideal for making small, rounded cuts. Start by scoring the tile along the curve with a pencil or marker, then use the nippers to carefully chip away the excess material. Work slowly and incrementally to avoid breaking the tile. For larger or more intricate curves, a jigsaw with a diamond blade can be used. Secure the tile and guide the jigsaw along the curved line, keeping a steady hand to maintain the curve’s smoothness. It’s important to follow the marked curve closely to ensure a clean, accurate cut.
Notches
Making precise notches is often necessary for accommodating fittings and fixtures. Start by marking the notch dimensions clearly on the tile. Use a tile cutter or wet saw to make the initial straight cuts of the notch. For corners and intricate details, you may need to use tile nippers to remove the remaining small sections. Another option is to use a rotary tool with a diamond bit for finer control and accuracy. Carefully follow the marked lines and make incremental adjustments to achieve the exact shape needed for the notch. Ensuring that the notches are precise will help in fitting the tiles around fixtures and achieving a professional finish.
Handling Difficult Materials
1. Cutting Porcelain vs. Ceramic Tiles
Porcelain and ceramic tiles both require specific techniques due to their differing properties. Porcelain tiles are denser and harder than ceramic tiles, which can make them more challenging to cut. When cutting porcelain tiles, it’s advisable to use a wet saw with a diamond blade. The water helps to cool the blade and reduce dust, while the diamond blade provides the necessary strength to handle the hardness of the porcelain.
In contrast, ceramic tiles are generally easier to cut. For ceramic tiles, a manual tile cutter can work well for straight cuts. The scoring wheel on the cutter can handle the softer surface of ceramic tiles more effectively. For more intricate cuts, a wet saw or tile nippers can also be used. Always ensure the tile is securely held in place and aligned properly to achieve a clean cut.
2. Tips for Cutting Through Thicker or Harder Tiles
When working with thicker or harder tiles, such as those made of stone or thick porcelain, extra care is required. A wet saw is often the best choice for these materials as it can handle the additional thickness and density. Ensure the blade is sharp and suitable for the material. If you’re using a tile cutter, make sure it is designed to handle thicker tiles, as standard cutters may struggle with increased thickness.
For particularly tough materials, consider using a diamond blade on an angle grinder. This tool can cut through very hard materials but requires careful handling to maintain control and accuracy. Always wear safety gear to protect yourself from dust and debris.
Finishing Touches
After cutting tiles, it’s important to smooth the edges and clean up any rough areas. Use a tile file or a rubbing stone to gently smooth out any jagged edges or imperfections. This step ensures that the tiles fit neatly together and prevents sharp edges from causing injury or damage. Once the edges are smoothed, clean the tiles to remove any dust or debris. A damp cloth or sponge can be used to wipe down the tiles, ensuring they are clean and ready for installation.
To ensure a perfect fit, check each tile against the space where it will be installed. Make sure the tiles align correctly and fit snugly without gaps. For areas where the tiles may not fit perfectly, make any necessary adjustments by trimming or sanding the edges. This attention to detail will help achieve a seamless and professional finish for your tiling project.
Summary
Achieving precise tile cuts involves using the right tools, measuring accurately, and applying the correct techniques for each type of cut. Remember to smooth edges and ensure a perfect fit for a professional finish. With practice and patience, you can improve your tile cutting skills and achieve excellent results. Keep honing your techniques, and don’t hesitate to experiment with different tools and methods to enhance your craftsmanship.
If you’re searching for high-quality tiles, explore our extensive collection at Tile Factory Direct. We offer a wide range of stylish and durable options to suit any project. Find the perfect tiles to elevate your space today!