Skip to content


Installing a tile backsplash can transform your kitchen or bathroom into a stylish and functional space. Not only does it protect your walls from spills and splashes, but it also adds a touch of personal flair to your décor. The benefits of installing a tile backsplash include enhancing the visual appeal of your space, increasing the durability of your walls, and providing a surface that’s easy to clean.
For those who enjoy tackling home improvement projects, a DIY tile backsplash installation is a perfect weekend warrior challenge. It allows you to add a custom touch to your home while honing your tiling skills. Plus, it’s a manageable project that doesn’t require extensive tools or professional expertise.
In this guide, you’ll learn everything you need to know to successfully install your own tile backsplash. We’ll cover the essential materials and tools, step-by-step installation instructions, and tips for achieving a professional finish. By the end, you’ll have the confidence and know-how to complete this project and elevate the look of your space.
Materials and Tools
When embarking on a tile backsplash project, gathering the right materials and tools is crucial for a successful installation. First, you’ll need the tiles of your choice. Whether you opt for ceramic, glass, or mosaic tiles, make sure to choose a style that complements your space. You’ll also need tile adhesive, often referred to as thinset mortar, to bond the tiles to the wall. Additionally, grout is necessary to fill the gaps between the tiles, providing both a finished look and added durability. Don’t forget to get a grout sealer to protect the grout from stains and moisture.
For the installation process, several essential tools will make your job easier. A tile cutter or tile saw is important for cutting tiles to fit around edges and obstacles. A notched trowel is used to spread the adhesive evenly on the wall. A grout float helps apply and smooth the grout, ensuring it fills the gaps thoroughly. A sponge and clean water are crucial for wiping off excess grout and cleaning the surface as you go.
For those looking to refine their technique or tackle more complex designs, some optional tools can be very useful. A tile level or spacer can help ensure that your tiles are evenly aligned and maintain consistent grout lines. A utility knife is handy for trimming tiles and cutting through any adhesive that may have squeezed out during installation. With these materials and tools at your disposal, you’ll be well-prepared to tackle your tile backsplash project with confidence.
If you’re in the market for high-quality porcelain tiles, look no further than Tile Factory Direct. They offer a wide selection of stylish and durable porcelain tiles at competitive prices, ensuring you find the perfect fit for your project.
Preparation
Before you start installing your tile backsplash, proper preparation is key to achieving a professional-looking result. Begin by measuring the area where you plan to install the backsplash. Use a tape measure to determine the height and width of the space, and then calculate the total square footage. This will help you determine how many tiles you need and ensure that you purchase enough to cover the area, including extra tiles for any mistakes or future repairs.
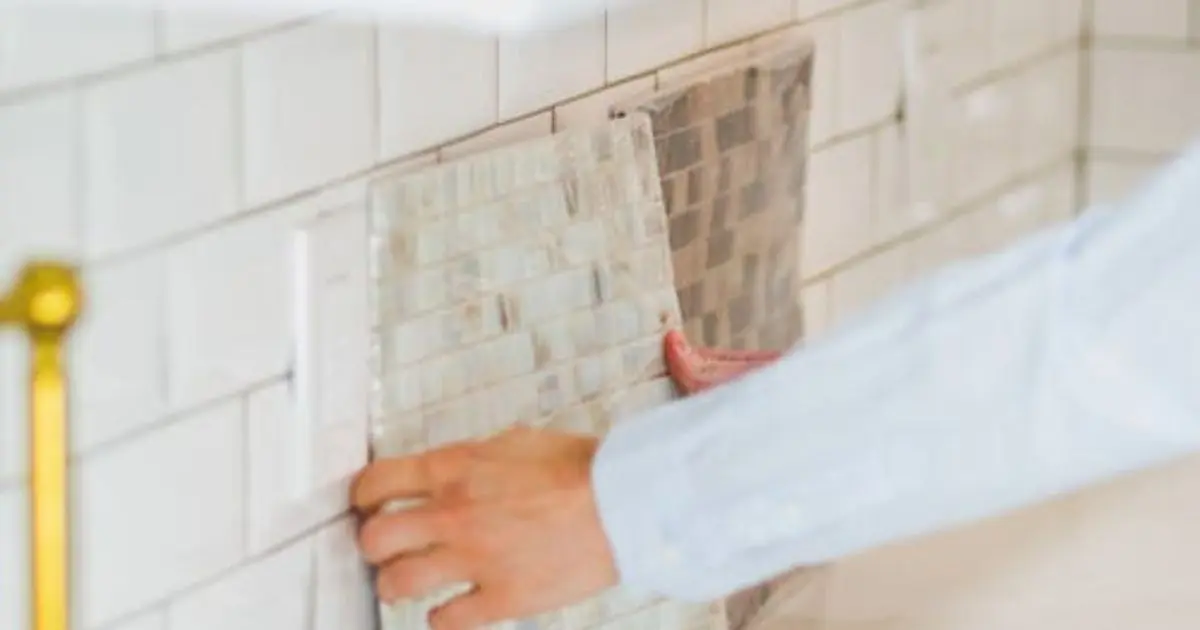
Choosing the right tile and design is crucial for both functionality and aesthetics. Consider the style of your kitchen or bathroom and select tiles that complement your existing décor. Popular options include ceramic tiles for their durability, glass tiles for a sleek and modern look, or mosaic tiles for intricate patterns. Think about the color, texture, and finish of the tiles to ensure they enhance the overall design of your space. You may want to bring home a few samples and place them against your wall to see how they look in your environment before making a final decision.
Preparing the surface is an essential step to ensure that the adhesive adheres properly and the tiles stay in place. Start by cleaning the wall thoroughly to remove any grease, dust, or dirt. A mild detergent and water should suffice for most surfaces. Once the wall is clean and dry, inspect it for any imperfections such as holes or cracks and repair them as needed. Priming the surface can help improve adhesion, especially if you’re applying tiles over a glossy or previously painted surface. Follow the manufacturer’s instructions for applying primer and allow it to dry completely before you begin tiling. With a well-prepared surface and a clear plan, you’ll be ready to move on to the installation process.
Installation Steps
Applying Adhesive
To ensure a strong bond between your tiles and the wall, start by applying adhesive evenly. Using a notched trowel, spread the adhesive over a small section of the wall, working in manageable areas to prevent it from drying out before you place the tiles. Hold the trowel at a 45-degree angle to create consistent ridges in the adhesive. These ridges help to evenly distribute the adhesive and ensure that the tiles adhere securely. Be sure to apply enough adhesive to cover the entire area where tiles will be placed, but avoid over-applying, as excess adhesive can squeeze out and create a mess.
Laying Tiles
When laying tiles, it’s crucial to start with a methodical approach. Begin by establishing a reference line or starting from the center of the wall to ensure that your pattern remains symmetrical. Use a level or a chalk line to create a straight, horizontal guideline as a starting point. This helps to keep your tiles aligned and prevents slippage. Place the first tile along the guideline, pressing it firmly into the adhesive. Continue laying tiles, placing spacers between them to maintain consistent grout lines. For edges and corners, measure and cut tiles as needed to fit snugly. It’s important to periodically check that your tiles are level and adjust as necessary.
Cutting Tiles
Cutting tiles accurately is essential for a clean and professional finish, especially around outlets and edges. For straight cuts, use a tile cutter, which scores and snaps the tile with precision. A tile cutter is ideal for larger, straight cuts and provides a clean edge. For more intricate cuts, such as around outlets or irregular shapes, a tile nipper is a valuable tool. Tile nippers allow for more detailed cutting and can help you make small adjustments for a perfect fit. When using a tile nipper, gently nibble away at the tile’s edges to achieve the desired shape. Both tools have their strengths, so choosing the right one for the task at hand will ensure a high-quality installation.
Grouting
Once your tiles are firmly set in the adhesive, it’s time to grout. Start by mixing the grout according to the manufacturer’s instructions until you achieve a smooth, spreadable consistency. Using a grout float, spread the grout over the tiles, working it into the gaps between them. Hold the float at a 45-degree angle and press the grout firmly into the spaces to ensure they are fully filled. Be sure to cover all the grout lines and remove any excess grout that spills over the tiles.
After applying the grout, you’ll need to remove the excess. Allow the grout to set for about 10 to 15 minutes, then use a damp sponge to wipe off the surface. Rinse the sponge frequently and use gentle, circular motions to avoid pulling grout out of the lines. Be careful not to let the grout dry on the tiles, as it can be more challenging to clean once set.
To achieve a polished finish, clean the grout lines thoroughly. Once the grout has set and hardened (usually after about 24 hours), use a grout cleaning brush or a small tool to remove any remaining grout haze from the lines. Make sure the grout lines are smooth and even, as this will enhance the overall appearance of your backsplash and give it a professional look.
Finishing Touches
To ensure the longevity and durability of your backsplash, sealing the grout is an important final step. Once the grout has fully cured, which typically takes about 48 to 72 hours, apply a grout sealer. Use a small applicator or brush to evenly apply the sealer over the grout lines, following the manufacturer’s instructions for the best results. Sealing the grout helps to protect it from stains, moisture, and mold, keeping your backsplash looking fresh and clean.
Next, clean up any remaining adhesive or grout residue. Use a damp cloth or sponge to wipe down the tiles and remove any leftover material. For stubborn residue, you may need to use a mild cleaning solution or grout haze remover. Be sure to thoroughly clean the area to avoid any unsightly streaks or spots on your tiles.
Finally, install any trim or edging to complete the look of your backsplash. Trim or edging pieces can provide a polished finish and cover any gaps between the tiles and adjacent surfaces. Use a strong adhesive or caulk to secure the trim in place, ensuring it is level and properly aligned. Once installed, wipe away any excess adhesive or caulk for a clean, finished appearance. With these finishing touches, your tile backsplash will not only be functional but also add a stylish and refined element to your space.
Summary
Installing a tile backsplash involves careful preparation, precise installation, and detailed finishing. By measuring your space, choosing the right materials, and following each step—from applying adhesive and laying tiles to grouting and sealing—you can achieve a stunning and durable result. We encourage you to take on this DIY project and transform your space with your own hands.
If you’re looking for high-quality porcelain tiles, Tile Factory Direct is an excellent choice. They offer a wide range of stylish and durable options to suit any project.