Skip to content

Waterproofing a tile shower is about more than just aesthetics; it’s essential for keeping your space mold-free and structurally sound in the long run. A well-waterproofed shower not only boosts your bathroom’s beauty but also safeguards against potential damage, providing you with peace of mind for years to come.
Whether you’re a DIY enthusiast, hired contractor, or simply eager to learn, understanding the fundamentals of waterproofing can save you time, money, and plenty of headaches. With the right knowledge and tools, you’ll be well-equipped to create a durable and beautiful tile shower that stands the test of time.
So, join us as we guide you through each step of the process!
Step-by-Step Guide to Waterproofing Your Tile Shower
When it comes to your tile shower, proper waterproofing is essential for ensuring its longevity and preventing leaks. This vital process starts with thorough preparation, which sets the stage for a successful installation. By taking the time to plan and gather your materials, you’ll ensure a smoother workflow and better results.
Choosing the right waterproofing materials is a crucial step. Look for high-quality products designed specifically for tile showers, such as waterproof membranes and sealants. Each component plays a significant role in creating a watertight barrier that protects your investment from moisture damage and mold.
As you move through the waterproofing process, attention to detail is key. Make sure to apply your waterproofing materials evenly and allow adequate drying time between steps. This will help you create a stunning shower that not only looks great but also stands the test of time.
Ready to get started? Follow this comprehensive step-by-step guide to achieve that beautiful, leak-proof tile shower that you can enjoy for many years to come.
Step 1: Gather Your Materials
Before diving into waterproofing your tile shower, it’s essential to gather all the Waterproof tile installation materials.
You’ll need a waterproof membrane, which can be either a sheet or a liquid, depending on your preference. Don’t forget to grab tile adhesive, quality grout, and a reliable grout sealer. These items are crucial for ensuring your tiles adhere properly and remain protected from moisture. You’ll also need caulk—either silicone or acrylic—to seal joints and corners effectively.
Make sure you have the right tools on hand, too! A paintbrush or roller will help you apply the liquid membrane, while a trowel is necessary for spreading adhesive and grout. A utility knife and measuring tape will also come in handy as you prepare your shower area.
Having everything ready will save you time and frustration later on. So, take a moment to gather all your materials and tools; it’s a small step that makes a big difference in achieving a waterproof and beautiful tile shower.
Step 2: Prepare the Shower Area
Preparing your shower area is a crucial step in the waterproofing process. Start by removing any existing tiles and exposing the underlying substrate. This allows you to inspect the walls and floor for any damage that may need repair before you proceed.
Once you’ve cleared the area, take some time to clean it thoroughly. You want to make sure it’s free from dust, dirt, and grease, as these can interfere with the adhesion of your waterproof membrane. A clean surface ensures that everything sticks properly, providing a solid foundation for your waterproofing efforts.
Next, inspect your substrate for any signs of water damage or mold. If you find any issues, address them now to prevent future problems. Repair any damaged areas to create a strong, stable surface for your waterproofing.
Taking these steps to prepare your shower area will set you up for success. With a clean and well-maintained base, you’ll be ready to move on to the next phase of waterproofing your tile shower!
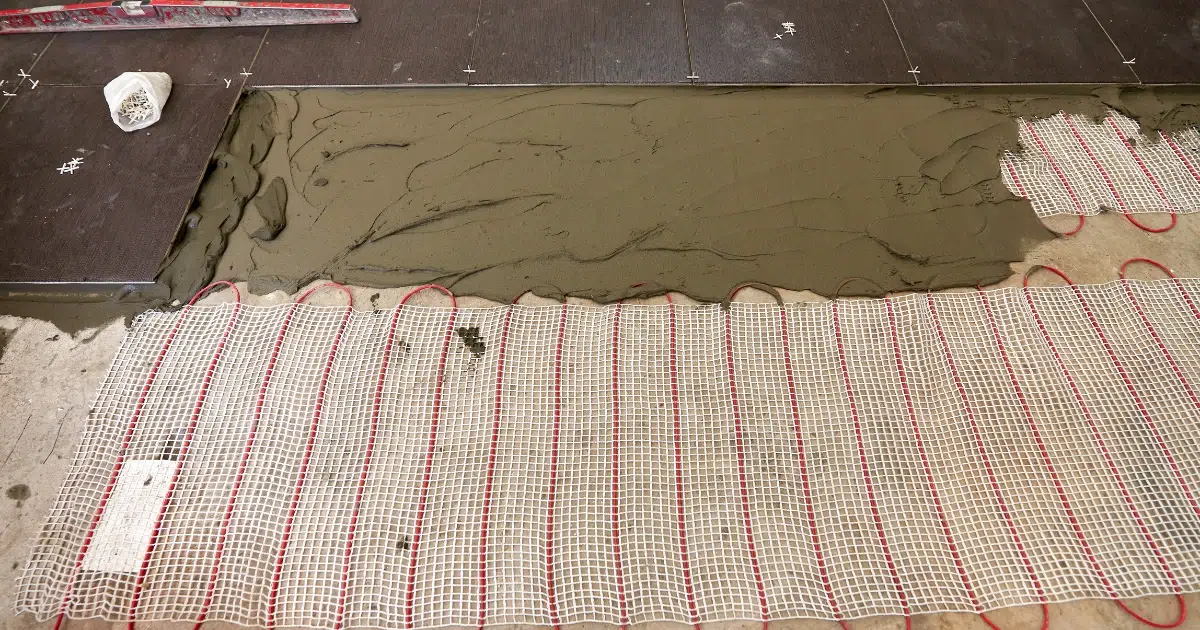
Step 3: Install the Waterproof Membrane
Installing the waterproof membrane is a pivotal step in ensuring your tile shower remains protected from moisture. If you’re using a sheet membrane, start by measuring the area and cutting the membrane to fit. Make sure it covers all surfaces, including walls and the shower pan, to create a complete barrier against water.
Once you’ve cut the membrane, apply thin-set mortar to the substrate using a trowel. This will help the membrane adhere securely. Carefully press the membrane into the mortar, smoothing it out to eliminate any wrinkles or air pockets. It’s crucial to ensure a snug fit for optimal waterproofing.
If you opt for a liquid membrane instead, use a brush or roller to apply an even coat over the substrate. Follow the manufacturer’s instructions for the number of coats and drying times. Pay special attention to corners and seams, as these areas are most susceptible to leaks.
In taking the time to install the waterproof membrane correctly, you lay the groundwork for a long-lasting, leak-free tile shower. A well-installed membrane will give you peace of mind and keep your shower looking beautiful.
Step 4: Tile Installation
Now that your waterproof membrane is securely in place, it’s time to start tiling your shower. Begin by applying tile adhesive to the membrane with a notched trowel. Make sure to spread it evenly to create a solid bond for your tiles. This step is crucial for ensuring that your tiles stay in place and resist water infiltration.
Once the adhesive is applied, carefully press your tiles into the adhesive, making sure to leave consistent gaps for grout. Take your time with this step; aligning the tiles properly will enhance the overall appearance of your shower. If you’re using larger tiles, consider using spacers to maintain even spacing between them.
After you’ve laid all the tiles, allow the adhesive to set according to the manufacturer’s instructions. This usually takes about 24 hours, but it’s essential to check the specific guidelines. Rushing this step can lead to tiles shifting or coming loose, which could compromise your waterproofing efforts.
With patience and attention to detail, your tile installation will create a beautiful and functional shower. Enjoy the process, knowing that each tile you place brings you one step closer to your stunning, waterproof shower!
Step 5: Grouting
Once your tiles are firmly in place, it’s time for the grouting process. First, choose the right grout for your tiles, as it affects both aesthetics and durability. Then, mix the grout according to the manufacturer’s instructions, ensuring the right consistency. Too thick or too runny grout can lead to problems down the line. Once mixed, grab a grout float and start applying the grout to the spaces between the tiles.
As you apply the grout, make sure to press it firmly into the gaps. This ensures that every crevice is filled, providing a solid barrier against moisture. After you’ve filled all the joints, use a damp sponge to wipe away any excess grout on the tile surfaces. Be careful not to remove grout from the joints—just clean the tiles for a neat finish.
You want to allow the grout to cure as per the instructions, typically around 24 hours. This waiting period is essential, as it allows the grout to harden and bond effectively, minimizing the risk of cracking or falling out later.
Proper grouting is vital for a waterproof shower, so take your time with this step. Once complete, you’ll be one step closer to enjoying your beautifully tiled, moisture-resistant shower.
Step 6: Seal the Grout
After your grout has fully cured, it’s time to protect it with a grout sealer. This is a vital step in maintaining the integrity of your tile shower. You want to begin by choosing a high-quality grout sealer that suits your specific grout type. Applying sealer will help prevent moisture from penetrating the grout, reducing the chances of mold and stains.
To apply the sealer, use a small brush or a roller for even coverage. Make sure to coat all the grout lines thoroughly. It’s essential to follow the manufacturer’s instructions regarding the application process and drying time. Some sealers may require multiple coats for optimal protection, so be prepared to invest a little extra time if needed.
Once you’ve applied the sealer, give it ample time to dry completely before using the shower. This ensures that the sealer adheres properly and creates a strong barrier against moisture.
Sealing your grout not only enhances its durability but also keeps your shower looking fresh and clean.
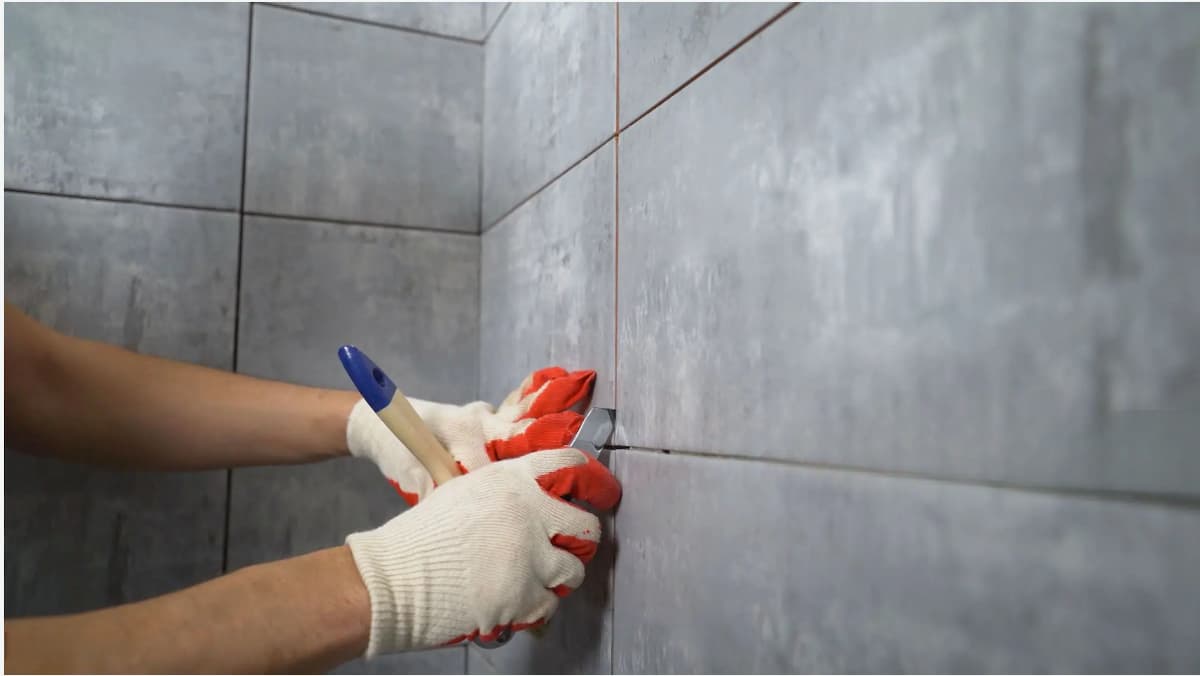
Step 7: Caulking
The final step in waterproofing your tile shower is caulking. This step is essential for sealing joints and corners where the tiles meet other surfaces, such as the shower base, walls, and fixtures. Proper caulking prevents water from seeping into these vulnerable areas, reducing the risk of mold and water damage.
You can start by selecting a high-quality silicone or acrylic caulk that is specifically designed for wet environments, with silicone often preferred for its flexibility and water resistance.
Before applying the caulk, ensure that the surfaces are clean and dry. If necessary, remove any old caulk or debris from the joints to create a smooth surface for the new application. Using a caulking gun, apply a bead of caulk along the joints.
Aim for a consistent, even line, and use your finger or a caulk smoothing tool to smooth it out and push it into the seam. This not only improves the appearance but also ensures a tight seal. Allow the caulk to cure fully according to the manufacturer’s instructions, which typically takes 24 hours.
For additional guidance, Schluter Systems provides educational materials on the proper installation of waterproofing products. Their resources can help you understand best practices and ensure that your shower remains watertight.
Step 8: Final Inspection and Maintenance
With your tile shower fully installed and waterproofed, it’s important to conduct a final inspection to ensure everything is in perfect order. Check all seams, corners, and grout lines for any gaps or imperfections. If you notice any areas that need touch-ups, address them now to prevent future issues.
Once you’re satisfied with the installation, it’s essential to implement a regular maintenance routine to keep your shower in top condition. Start by cleaning the tiles and grout regularly using a mild, non-abrasive cleaner. Avoid harsh chemicals that can damage the grout or tiles.
Pay special attention to the caulked areas. Inspect them periodically for signs of wear or cracking, and replace any damaged caulk promptly to maintain a watertight seal.
Consider reapplying grout sealer every six months to a year, depending on usage and water exposure. This will help prolong the life of your grout and keep it looking fresh.
Conclusion
Congratulations on completing your tile shower installation! We hope this guide has equipped you with the knowledge and confidence to tackle such a rewarding project. Your dedication to waterproofing and maintaining your shower will ensure its beauty and functionality.
If you have any questions or need further assistance, we invite you to contact us. Your feedback is valuable, and we’d love to hear about your experiences. If you found this guide helpful, please share it with friends or family who might benefit from it.
Whether you decide to tackle the project yourself or hire a contractor, Tile Factory Direct provides a variety of resources to guide you through your tile project.
Don’t forget to explore our other related content for more home improvement tips and inspiration.